PVI Online course logo

Web Page Design Module 1: Creating Web Pages with HTML Tags


Building Tables
HTML tables let you display information in data cells similar to the cells in a spreadsheet.  Table tags are not hard to use, if you clearly know what you want to display in each cell.

  1. Tables are defined with the <table> container tag.
  2. The <table> tag contains rows of cells, defined with the <tr> container tag.
  3. Each <tr> tag contains data cells, defined with the <td> container tag.
  4. Each data cell contains whatever you want-- links, images, lists, or even other tables.

Rows are defined from top to bottom, and cells are defined from left to right. If you want lines to show up between the table cells, use the border attribute in the <table> tag.
For example, the HTML code
<table border>
<tr>
<td>A Lunch</td>
<td>B Lunch</td>
<td>C Lunch</td>
</tr>
<tr>
<td>Social Studies Classes</td>
<td>Math Classes</td>
<td>English Classes</td>
</tr>
</table>

will be displayed in a web browser as:

A Lunch

B Lunch

C Lunch

Social Studies Classes

Math Classes

English Classes

Aligning Cell Contents Within the Cells
Usually, all cell contents are left-justified and vertically centered by default. To set the horizontal or vertical placement within the <td> tag, use the align and valign attributes, respectively:

  • align can be leftright, or center.
  • valign can be topmiddlebottom, or baseline (aligned to baseline of the text).

For example:

<table border>
<tr>
<td align=center>A Lunch</td>
<td align=center>B Lunch</td>
<td align=center>C Lunch</td>
</tr>
<tr>
<td>Social Studies Classes</td>
<td>Math Classes</td>
<td>English Classes</td>
</tr>
</table>


will be displayed in a web browser as:

A Lunch

B Lunch

C Lunch

Social Studies Classes

Math Classes

English Classes

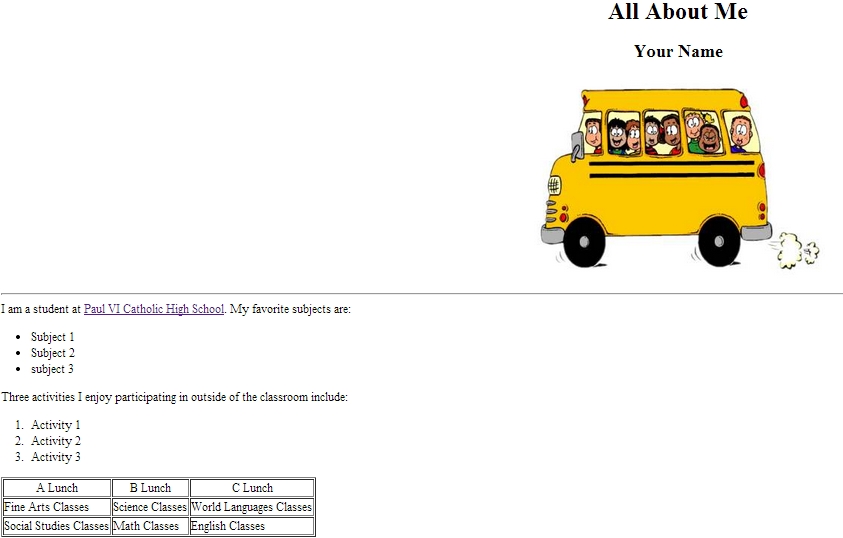
You can also use the align and valign attributes in the <tr> tag, to affect all cells in that row.

Let's practice this by adding the tags in the example above to your first webpage after the </ol> tag. Add an additional row to your table for Fine Arts under A Lunch, Science under B Lunch, and World Languages under C Lunch.

When you are finished entering your tags replace your original html file by selecting File and then selecting Save. Close your Notepad file and navigate to your HTML file folder on your Google Drive. Select first webpage to preview what your file will look like in a web browser. Your file should look like this.

first webpage table

If your changes don't appear in the browser window, select the Refresh button. If your picture isn't displayed in the center of your web page, return to Notepad, select the file and make the necessary corrections. If you need assistance completing this exercise preview the Screen Captured Video. You can also find a link to this video on your Student Resources page. Send your mentor an email with the Subject Line "Request for Help" if you need help finding the errors. If you do not need assistance, proceed with the next page, Adding Color.


Back to Module 1 Inserting Images Next Module 1 Adding Colors